Snow today, our second snow of the season. On December 14, 2000, the day we closed on the house, we had a terrific snowstorm, with over 16 inches of snow, and that was the second or third storm of the season. We had a lot of snow that year, and a couple of long cold snaps; it felt like the Maine of my youth. I remember shoveling the driveway and wondering where we were going to actually put the snow.
In the intervening years, we've had far less snow. The year before last, we bought a small electric snowblower at the end of the season, and last year we did not even use it once. Not that I'm complaining, mind you. While I like the snow, I'm over the thrill of shoveling my very own driveway.
The chickens don't like the snow. Its funny, they will be out all day in a cold November rain, but they totally freak out over the snow. The first storm we had they completely refused to leave Henbogle Coop, staying inside for 2 straight days, even though we opened the door for them every day. This morning when I brought them some spinach and aging grapes, they were in the Coop, but did come out reluctantly for their treat.
After the first snowstorm, Dan and I assembled a hoop house for the girls, to give them a snow-free place to roam, so today I threw their treat into the hoop house to lure them in. Iris refused to come out into the snow, but Poppy, Marigold, Hyacinth and Zinnia braved the terrifying flakes to scarf up some grapes. They liked their snow dome, because when I checked on them later in the afternoon, the four of them were still there and looked to have spent much of the day there, while Iris fretted alone in the coop. Silly chickens.
Saturday, December 30, 2006
Thursday, December 28, 2006
The Sump Pump Project
We've known for some time now that we were going to have to re-plumb our sump pump, as it was draining directly into our sewer line, which is a no-no.
Sump pumps, for those of you fortunate enough to be ignorant of them, are submersible pumps set into a low spot in a basement to pump out any water that accumulates, say from a quick and rainy thaw in April, or an especially rainy spell. In our old 1880s Cape, we have a dirt floored basement with a combination of granite, fieldstone and brick foundation walls. In especially wet springs, such as the April of 2005, the sump pump ran 24 hours a day for several days. In other springs, it never clicks on.
Anyway, the need to tackle this project was forced upon us by a letter from the water company telling us in no uncertain terms it was time to take action. We decided we might as well do it right and re-dig the sump well and install a plastic basin. Dan found a new sump pump at a tag sale last summer for $5, saving us about $95, so we wanted to set it up in a way that would maximize the new pump's life expectancy.
An unpleasant task to begin with, the unpleasantry is magnified 1000 times by the fact the work had to be done in our icky basement. I'm sure there are worse basements, maybe in the Addams Family home, but ours is not a nice place. It is populated by maybe 10 million spiders, all excellent web makers, and resembles that scene in Raiders of the Lost Ark where Indiana Jones delves through the cobwebs, except without Indiana Jones, or treasure. Sigh. In addition to the spider webs, there's a creepy overturned antique bathtub along one wall -- what is under that thing? I'm not looking.
Anyway, down we went into the bowels of the house, and created this glorious vision of modern plumbing. Dan re-dug the hole, added a layer of gravel, a plastic basin, more gravel in the basin and in the hole between the basin and the walls. Then some nice level bricks for the pump to sit upon, a check valve (thanks Nick at the hardware store for that suggestion), and connect the hose. The hose snakes it's way to the window, now replaced with plywood and insulation, through the plywood and outside. We need a bit more hose, but the majority of the work is done, yee hah! Cross that one off the list!
Wednesday, December 27, 2006
Mac 'n cheese Ali style
I've been hoarding some leftover ham, waiting for the right moment to make some macaroni and cheese with ham. Well, head cold be darned, after an overcast gray day today highlighted by the unpleasant sump-pump project, tonight was the night, and it hit the spot, served with some yummy steamed broccoli. (More about the sump pump project soon, I know you'll be riveted.)
I started with the basic recipe from my favorite old standby, the Fannie Farmer Cookbook, and surprise, surprise, made a few changes.
First, start boiling a big pot of water for the pasta, and pre-heat the oven to 350F. Butter a baking dish and set aside.
Ali's Mac 'n Cheese
4 T butter
4 T flour
2 1/2 c milk, scalded
1 small onion, finely diced
1/2 t smoked Spanish Paprika
1 1/2 c Cabot Hunter's Sharp Cheddar, grated
1/2 c Cabot Habanero Cheddar, grated
1/2 lb cooked macaroni or other curvy pasta such as Barilla Cellentani
When the water comes to the boil, cook the pasta as directed, and set aside in a buttered baking dish. Sautee the onions until soft in 1 T of the butter. Stir in the Spanish paprika and set aside. Over medium heat, melt the remaining butter in a saucepan, then stir in the flour. Stir and cook until well combined. Add the hot milk, a little at a time, stirring well after each addition. When all the milk has been added, bring to a boil over medium heat, stirring constantly. Add the onions, and allow to boil for 2-3 minutes to cook flour and thicken. Add the grated cheeses, stirring to melt. Stir into the pasta, pop into the oven and bake for 30 minutes until bubbly and just browned on the edges. Enjoy!
I get many of my spices, including the Smoked Spanish Paprika, from Penzey's Spices. (They have a great selection of excellent spices and herbs, and are especially useful for locating rather hard to find items, such as top quality candied ginger.) I added some diced leftover ham, just after the cheeses. Leftover broccoli is also a yummy addition. This makes enough for plenty of leftovers for lunches.
Wintry Gifts
'Tis the season of giving, and we here at Henbogle House have given and received many joyous gifts, and a couple of less than welcome gifts, we each got an all-to-common cold, ICK. Dan came down with his cold on Saturday, and I followed on Christmas Day. Nonetheless, we had a lovely Christmas Day, beginning with a breakfast of Cranberrry-Orange Scones and Individual Cheddar Souffles, with espresso from my shiny new stovetop espresso maker.
We then moved on to an orgy of gift-giving and receiving. Among the many lovely presents I received was a new Canon PowerShot digital camera with telephoto lens! I'm really looking forward to giving that a workout and sharing the results here on Henbogle.
I made Dan's techy-dreams come true with a new iPod Nano and an iHome digital clock radio/iPod player device, which included a remote control. Does it get any better? Now he's in step technology-wise, at least, with his students. Hmmm, I wonder if that's tax deductible?
We each received many other delightful gifts, but I would be remiss not to mention the wonderful friendships we have here in our little town. We shared much of the day with friends Bill & Michelle, enjoying a fabululous dinner of swordfish and roasted vegetables, mmmm. Later we joined friends Karen and Bill for a quick visit.
Another favorite gift that no doubt will be mentioned in the future as I plan and scheme, the book The Bread Builders: Hearth Loaves and Masonry Ovens. This fascinating book is an excellent resource for bread bakers, and also gives informative descriptions of a variety of masonry ovens, and detailed plans for constructing one. I've been making-do with clay tiles in my gas oven, but boy, do I want one of these ovens! Imagine a wood-fired bread and pizza oven in your backyard! I'll be dreaming all winter.....
Saturday, December 23, 2006
Approaching Pizza Perfection
I've been working on my pizza skills for some time, looking for the perfect crust. I tried deep dish dough, cornmeal dough, Alton Brown's dough, you name it, I tried it. Finally, I'm approaching the pizza I've been searching for.
I adapted a recipe from Peter Reinhart's book American Pie, Napoletana Pizza, simplifying the process considerably, and adapting it for my oven. I cook the pizza directly on heavy clay tiles I bought at Home Depot for a fraction of the cost of a pizza stone. I had two tiles cut so the that I have a large surface area on which to bake the pizza or bread. If the tiles get too stained, I heave them and start over. The tile cost me less than $6 total. Here's my version of the recipe.
Nirvana Pizza Dough
4 1/2 c flour
1 3/4 t salt
1 t yeast
2 T olive oil
1 3/4 c water
flour for dusting
Stir together the flour, salt, and yeast. Stir in the oil and the cold water until the flour is all absorbed. Stir or knead with the electric mixer for 5 to 7 minutes, or until the dough is smooth and the ingredients are evenly distributed. The dough should be smooth and sticky.
Sprinkle flour on the counter and transfer the dough to the counter. Work into a log, then divide the dough into 4 equal pieces. Sprinkle flour over the dough. With dry floured hands, round each piece into a ball, dust with flour and transfer to a plastic bag. Store in the refrigerator overnight to rest the dough, (will keep for up to 3 days.)
Remove dough from the refrigerator 2 hours before making the pizza. Dust the counter with flour place the dough on floured breadboard and sprinkle with flour. Flatten disks gently to about 1/2 inch thick and 5 inches in diameter. Don't get it too thin or it will be hard to handle later. Sprinkle with flour, cover loosely with plastic and let rest for 2 hours.
At least 45 minutes before making the pizza, place a baking stone on a rack in the lower third of the oven. Preheat the oven to 450F. Generously flour the peel.
Gently stretch the dough out to about 9 inches in diameter, lay it on the peel or pan, making sure there is enough flour to allow the pizza to slide off the peel. Add 3 or 4 toppings, including sauce and cheese.
Slide the pizza onto the stone. Bake about 5 to 8 minutes, until the cheese and crust have browned. Remove from the oven and transfer to a cutting board. Now the hard part: Cool for 3 to 5 minutes and serve. YUM!
I generally use a simple red sauce of whole Roma tomatoes, chopped, cooked with a little garlic and olive oil. Other favorite toppings include ricotta and spinach, Italian sausage, mozzarella and parmesan, pesto and parmesan.... the options are as unlimited as your imagination.
Although finding the right crust recipe has been difficult, in my experience, the real challenge is getting the pizza onto and off from the peel successfully. Somehow, I always seem to end up with the kitchen windows wide open, fans blowing the smokey air out as the shriek of the smoke detector pierces my skull and smatterings of pizza toppings 'caramelize' on the oven floor. Clearly, I need to build an outdoor Italian brick oven for breadbaking and pizza, don't you think?
The Solstice Fire
Friday, December 22, 2006
Happy Solstice To All
The wheel turns, a new season begins. Here in Maine, the first day of winter is clear and mild, with temperatures in the upper 30s. What little snow we had is gone, and the grass remains green but thankfully not growing long enough yet to get the mowers out of storage again.
It looks like we won't be having a white Christmas this year, but I'm counting my blessings: lots of time for my fall plantings to settle in, good commuting weather, the chickens are far happier without snow, my aging furnace hasn't had to work too hard, and that of course makes the oil consumption a little less, too.
In honor of the change of seasons, I've added a countdown clock to my blog, counting down the days until spring. Tonight some friends will gather here to light a celebratory fire and enjoy good food, drink and companionship. Life is good, happy Solstice to all!
Tuesday, December 19, 2006
Ooops!
Dan's mom called the other night, asking about the recipe for Italian Cookies I posted recently. She was looking at her version of the recipe and noticed I had left off the baking soda, yikes! That explains why my cookies tasted rather flat and leaden this year...
I knew something was wrong, but thought it might be the new trans-fat free Crisco. No, it was the lack of leavening. Thanks for catching the error, Mom!
The corrected recipe:
ITALIAN COOKIES
8 c flour
1 1/2 c sugar
4 t baking powder
9 eggs
1 lb of Crisco
Cream the Crisco and sugar. Add eggs, beating after each egg. Stir in the flour, mixing well. Chill for at least 2 hours or overnight. Roll out about 1/2” thick. Bake at 350 for 12-15 minutes, Cool, and frost with Citrus Icing or Royal Icing.
Monday, December 18, 2006
I don't like pea soup
The other day, after many hints from Dan, I made pea soup for the first time. I used a recipe from my new pressure cooker book, Lorna J. Sass's Pressure Perfect, and made it my pressure cooker.
It smelled good cooking, but the minute I opened the lid, the memories of my first job as a kitchen helper at the Chapel Valley Boarding Home came flooding back. I clearly remembered scrubbing the big aluminum pots used to cook the pea soup --not one of the more pleasant tasks of my life. The pea soup clung to the pot like it was soldered on. Compounding the issue was the fact that pea soup was not a favorite with many of the residents.
Dan promised me my soup was good, but I didn't enjoy even one bite. The memories were too pervasive. Pea soup is off my list for life.
Crunch of the gods
This weekend, in addition to seeing to my hens' comfort by constructing them a hoop house for the winter, I made two Christmas treats to share with friends, Almond Toffee, and Spicy Ginger Cookies. Both are fantastic, and not terribly difficult.
Almond Toffee
2 1/2 c whole almonds, toasted, coarsely chopped
1 c (2 sticks) unsalted butter
1 cup sugar
2 T light corn syrup
1/2 t sea salt
1 t vanilla
8 oz. Ghiradelli semisweet chocolate chips
Special equipment: candy or digital thermometer
Finely chop 1/2 cup of the almonds and reserve.
Lightly oil a 15” x 10” jelly roll pan (I used non-stick foil).
In a 2- to 3-quart heavy saucepan combine butter, corn syrup and sugar. Bring mixture to a boil over moderate heat, stirring occasionally as sugar dissolves. Boil, stirring occasionally, until thermometer registers 300°F, or until the mixture is the color of dark peanut butter. Quickly stir in almonds and immediately pour mixture into baking pan. With a spatula quickly spread toffee in an even layer.
Let mixture stand 1 minute (it will still be very hot) and sprinkle evenly with chocolate chips. Let chips melt and with spatula spread chocolate evenly over toffee. Quickly sprinkle reserved finely chopped almonds evenly over chocolate. Allow to cool, then chill toffee until chocolate is firm, at least 2 hours, and up to 2 weeks, covering tightly after 2 hours. Break toffee into bite-size pieces and keep chilled to prevent chocolate from melting.
Makes about 2 1/2 pounds.
WOW, was this good!! We took some to friends Karen and Bill last night and it rapidly disappeared. I was a bit trepidatious after hearing toffee horror stories --rock hard burnt sugar permanently bonded to the pan, or greasy, soft candy mush oozing out of the box, but I used a low heat setting and was all prepared in advance, and it went really well. I plan to try making it with tempered chocolate next time to avoid the need to keep it chilled.
Photos of the remains and more on the ginger cookies later, time to head to work.
Saturday, December 16, 2006
Hen Crossing
This photo, taken by staff photographer Andy Molloy appeared in the Friday, December 15 Kennebec Journal, with the caption below.
Wednesday, December 13, 2006
What cost economic growth?
Driving to work yesterday listening to Maine Public Radio, I heard an opinion piece on Marketplace that really wound me up. David Frum, a former Bush speechwriter and policy wonk with the American Enterprise Institute made the argument that "economic populism," (i.e. government intervening in the market to ensure that big business treats America workers fairly and ensures prosperity and minimal living standards for all) is a recipe for economic slowdown.
Frum argued that even the slightest decrease in economic growth, say from 3 to 2.5 percent annually over the next 5 years, would be disastrous, causing the U.S. to slip dangerously from its front runner position in world economies.
Ok, the gap between the U.S. and the rest of the world will close, but why is that so terrible? The economies of many other developed nations lag far behind ours, but these nations still prosper. Britons and Canadians enjoy good quality health care, education, a high standard of living. The countries of Norway, Sweden, Denmark are known worldwide for their far-sighted views of maternity leave and childcare. Dare I suggest that if in this country our economic resources were fewer, we might use them more carefully?
Reaching back through the cobwebs of time to my freshman economics class in college, I must have learned the benefits of being the economic front runner, but from my current perspective, I see that unchecked economic growth is not lifting up our nation as a whole, but is creating a widening income gap between the rich and poor, and driving the former middle class into the working poor.
The average workers' wages have not kept up with inflation, and yet Forbes magazine reported that the 400 richest Americans increased their wealth by 10 percent last year, while the minimum wage still keeps our low-skill workers living in poverty.
I think it's time to take a new look at economic populism, which perhaps should be re-defined as taking care of our neighbors, to make sure we all enjoy a standard of living that allows us housing, health care, child care, access to a quality education, and nutritious food on our tables.
Sunday, December 10, 2006
Cookies + Frosting = Procrastination
Several of my student workers came over today for a holiday cookie decorating party and dinner.
Exams begin Wednesday, and this offered them a great opportunity to load up on sugar and caffeine, have a well balanced healthy meal, prepare snacks for exam week, and have some fun. At least I think they did!
Hard at work.
Look at these fabulous designs --move over, Martha!
A Tale of Two Cookies
Saturday I made 2 more batches of cookies, a vanilla sugar cookie made with cream cheese, which was supposed to make it easier to roll out, and a batch of gingerbread cookies. Both are new recipes I am testing.
The ginger cookies were a bit fussy to make, requiring a saucepan to heat the brown sugar, molasses and spices together, but are very good, and the dough is very easy to work with, although I was initially concerned with would be sticky. The only change I might make is to add 1/2 teaspoon of ground white pepper, or up the ginger a bit, but they are pretty good as is!
The sugar cookies I am less pleased with, partially no doubt because plain sugar cookies are my least favorite kind of cookie, but the dough was much fussier to work with, requring chilling before rolling out, then again before baking the cut cookies. And then they require more care in baking, too. For all that work and fussing, they don't wow, they are a very plain tasting cookie --perhaps better for frosting, but we'll see.
Gingerbread Cookies
2/3 cup molasses
2/3 cup packed dark brown sugar
2 T ground ginger
1 T ground cinnamon
1 t ground allspice
1 t ground cloves
2 t baking soda
1 c unsalted butter, cut into tablespoon-sized pieces
1 large egg, lightly beaten
3 3/4 to 4 cups all-purpose flour
1/2 t salt
Bring molasses, brown sugar, and spices to a boil in a 4- to 5-quart heavy saucepan over moderate heat, stirring occasionally, and remove from heat. Stir in baking soda (mixture will foam up), then stir in butter 3 pieces at a time, letting each addition melt before adding next, until all butter is melted. Add egg and stir until combined, then stir in 3 3/4 cups flour and salt.
Preheat oven to 325°F.
Transfer dough to a lightly floured surface and knead, dusting with as much of remaining 1/4 cup flour as needed to prevent sticking, until soft and easy to handle, 30 seconds to 1 minute. Halve dough, then wrap 1 half in plastic wrap and keep at room temperature.
Roll out remaining dough into a 14-inch round (1/8 inch thick) on a lightly floured surface. Cut out cookies and transfer to baking sheets.
Bake cookies until edges are slightly darker, 10 to 12 minutes total (watch carefully toward end of baking; cookies can burn easily).
Makes about 4 dozen cookies.
Sugar Cookies with Cream Cheese
2 1/2 c all-purpose flour
3/4 c sugar
1/4 t salt
2 sticks unsalted butter cut into tablespoon-sized pieces, at room temperature
2 t vanilla
2 t cream cheese, at room temperature
Pre-heat oven to 375 degrees
Mix flour, sugar, and salt in mixer on low speed until combined, about 5 seconds. With mixer running on low, add butter 1 piece at a time; continue to mix until mixture looks crumbly. Add vanilla and cream cheese and mix on low until dough just begins to form large clumps.
Turn dough onto floured board; knead dough by hand; divide in half, form 2 disks, wrap each in plastic, and chill for at least 30 minutes.
Roll out dough to about 1/8 inch thick on a lightly floured surface. Cut out cookies and transfer to baking sheets.
Chill dough on cookie sheets for about 10 mkinutes, then bake cookies until edges are slightly darker, about 10 minutes
Makes about 3 dozen cookies.
Fussy, and too thin. I'm going back to my favorite Citrus Sugar cookies next year.
Friday, December 08, 2006
Cookie Madness begins
I've invited my student workers over for a holiday cookie decorating party Sunday afternoon. Tonight I made up a batch of Dan's favorite cookie, Italian cookies, so-called because as a kid, his family was good friends with an Italian family, the Barbarossas. This is Mrs. Barbarossa’s recipe for Christmas Cookies. It makes a HUGE batch….
ITALIAN COOKIES
8 c flour
1 1/2 c sugar
4 t baking powder
9 eggs
1 lb of Crisco
Cream the Crisco and sugar. Add eggs, beating after each egg. Stir in the flour and baking soda, mixing well. Chill for at least 2 hours or overnight. Roll out about 1/2” thick. Bake at 350 for 12-15 minutes, Cool, and frost with Citrus Icing or Royal Icing.
CITRUS ICING
This recipe makes about three cups of icing.
6 tablespoons fresh lemon juice
1/4 cup milk
6 to 8 cups powdered sugar
Assorted food colorings (the gel colorings work best)
Combine lemon juice and milk in large bowl. Whisk in 5 cups powdered sugar. Gradually whisk in enough remaining sugar by 1/2 cupfuls to form icing stiff enough to pipe (mixture will resemble stirred sour cream).
Divide remaining icing into zip-loc sandwich bags, one bag for each desired color; mix food coloring by drops into each bag, tinting icing to desired shade. Carefully knead bag to mix. To decorate, cut a tiny bit off the corner of the bag, and squeeze frosting through.
As I'm making the cookies tomorrow, I made the Italian Cookie dough tonight, as it needs to chill thoroughly for best cookie cutting. This year, made with our own Henbogle eggs, the dough is much more yellow than it has been in the past... I wonder what the cookies will look like when baked?
Snow
We had our first real snow of the season overnight, enough for the town's crack road crews to be out sanding, and for Dan's district to call for a 2-hour delayed start to school.
Thus far we've got about 2 inches, with more predicted throughout the day. The National Weather Service is calling for 3-6 inches overall. It is beginning to look and feel more like winter!
Thursday, December 07, 2006
Eminent Mainers
I had a driveway moment the other night, listening to Arthur Douglas Stover being interviewed on Maine Public Radio, talking about his new book.
Eminent Mainers: Succinct Biographies of Thousands of Amazing Mainers, Mostly Dead, and a Few People from Away Who Have Done Something Useful Within the State of Maine came out last month and sounds like a great read.
It was published by Tilbury House and no doubt it will be available at local booksellers. You can listen to the story on Maine Public Radio
Tweaking the delicious, no-knead bread
The NY Times updated the story on the no-knead bread today, tweaking the recipe a bit, and offering the weight equivalents for bakers who use weight versus volume measure.
I made a batch early on, and have made several since then, and it has turned out perfectly every time. I'm planning on a batch this weekend with some Maine grown and milled flour I bought recently. Details later.
Tuesday, December 05, 2006
105 days 'till Spring
We may have had our first snow of the season yesterday, but with seed and plant catalogues arriving daily, I'm already counting the days until spring. The Sturdy Farmer Girls met tonight and placed our group FEDCO order, due by Friday, December 8 to qualify for the discount. Orders will be ready for pickup on Friday, April 27.
I haven't yet managed to winnow my apple tree list down from 12 +/- varieties, so I passed on ordering any fruit trees, contenting myself with blueberries, some conifers for screening, and ornamental shrubs. The order:
2 Bluecrop Blueberries
2 Elliott Blueberries
2 Earliblue Blueberries
1 Jersey Blueberry
1 Lonicera x brownii (native hybrid) Dropmore Scarlet Honeysuckle
1 Buddleia x weyeriana Honeycomb Butterfly Bush
1 Morden Sunrise rose
3 Japanese Painted Fern
3 Cascade Hops
5 Thija occidentalis American Arborvitae
5 Tsuga canadensis Hemlock
Still on my FEDCO list (I have until March for undiscounted orders): Apple, peach, and apricot trees.
Other shrubs on the list: a Spice bush (Lindera benzoin) a Carolina Allspice (calycanthus floridus), a dwarf fothergilla (fothergilla gardenii), and a BlueMist Spirea, (Caryopteris x clandonensis). I'm sure I'll think of more....
Be sure to check out the Days 'till spring counter just below my profile!
Sunday, December 03, 2006
The Festivus Tree
Thanksgiving is the butter holiday, Christmas is the ornament holiday. I really love the holidays... lots of good food, parties, time with friends, days off from work, and at Christmas, presents and ornaments. What could be better?
Christmas, though, is when my inner magpie comes into her own. If it's shiny, sparkly, or better yet, shiny and sparkly, I love it. I've always been this way -- even as a kid I spotted the rock with mica in it from yards away, and brought it home. I distinctly remember decorating the Christmas tree, unwrapping all the old ornaments and exclaiming gleefully over the ever-growing selection of favorites. Every year my collection of Christmas ornaments grows, some I purchase for myself (shocking I know) and many are gifts, and I have started Dan off on his own collection.
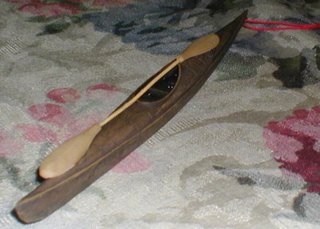
Yesterday, Dan and I went shopping, first to a couple of church fairs, then stopping at Skillins Greenhouses and Now Your Cooking and Reny's in Bath. Dan wanted to stop at Skillins, and as we entered, he shooed me off and headed into the gift department. I wandered over to a decorated Christmas tree near the checkout register, and then I recalled the recent sales flyer, which featured a kayak ornament. Enlisting the help of a clerk, I located the ornament and quickly purchased it, hiding it away from Dan. I then wandered off, oogling the goodies, and eventually saw Dan, heading to the cash register, hiding something from me. I wandered over to him, thinking as I did, that he came from that decorated tree area, hmmm..... I said "What did you get?"
"Its a secret he said," smiling, and then I knew. "Show me," I said, and sure enough, in his hand sat the same ornament I had just purchased. We are still laughing about that today.
The ornament collection has grown to the point that it won't fit on one tree, at least not a tree that will fit in our house. And I'm not one for theme trees --nope, I want to hang every ornament, after all, I only get to see and enjoy them for a few weeks a year. To facilitate my need for ornament hanging space, we've added a Festivus tree on the dining room table, a funky lime green metallic-glitter pre-lit tree. Covered with my precious sparkly, shiny ornaments, I think it will be glorious!
Friday, December 01, 2006
Suburban Dog
Fisher, our bone-headed Golden Retriever, was skunked again Wednesday night, fortunately with only a light shower of scent. Yes, you may recall that he was skunked fairly recently this past summer, too. I guess we are lucky because Dan had JUST come in from the backyard after putting the chickens to bed, so he must have narrowly missed crossing paths with Pepe le Pew.
I've finally realized what the problem is --he is a happy & goofy suburban dog, and I grew up with smart and savvy country dogs, and expected Fisher to be the same. Recalling the dogs of my youth, (Blackie, Frisky, Rascal Caesar, Julius), I can only recall 2 skunking episodes. Blackie was skunked once, I believe when she came upon a skunk IN the barn, and Rascal was skunked once in the backyard, but never again. Those dogs were mostly allowed to roam the property unrestrained, and came inside only at night.
I guess a suburbabn dog like Fisher just lacks the collective wisdon of country dogs when it comes to skunks, and blind instinct (must chase skunk!) will triumph over reason every time. SIGH.
Fortunately, we ALWAYS have on hand the ingredients for the magic skunk potion, so Dan was able to initiate an aroma-reduction exercise. Needless to say, we'll be replenishing our supply of hydrogen peroxide this weekend.
Subscribe to:
Posts (Atom)