Mainers are a thrifty lot, savers extraordinaire and experts at reinventing uses for old equipment. The infamous toilet lawn planter springs to mind, although equally thrifty would be the reuse of old cast iron-porcelain bathtubs as livestock waterers. My former landlord in Greenville, Lonnie Rowe, used an old delivery van as a chicken coop, and made wildlife watching perches out of old tractor seats set on pipes in the ground.
This thriftiness transfers into the food category, too. Chicken and turkey carcasses become stock, meat scraps go in the freezer to become soup. Of course, poultry owners have a ready source of birds to productively dispose of every scrap of food. And should you trap a big old coon or a give terminal lead poisoning to a pesky groundhog, well, there's good eating if you know how to prepare it properly.
For my birthday earlier this month, Dan found a great old-time recipe book for me, All Maine Recipes, published by the Courier Gazette of Rockland in the late 1960s. It is chock-full of good Maine recipes, many for game such as venison or pheasant, with some modern ones, too, with many variations of the Jello salad --shudder. (I even found a recipe from my long-ago landlady Irene Yerxa of Bridgewater, Maine, and Dan saw a recipe from a woman he knew in Waldoboro, Athlene Damon. Maine is a small town spread over a big state.)
And there are several recipes for preparing garden-chomping rabbit, raccoon and woodchuck.
It is good to know I have a resource handy for preparing varmint should the opportunity arise. You just never know.
Wednesday, February 27, 2008
Monday, February 25, 2008
Friday, February 22, 2008
Project completed
At 3:20 pm today, we finished our microhood installation project. In the end, we decided to wait on the Green man mosaic, simply because making a mosaic is the kind of project that just cannot be rushed, and we really wanted to finish this project (there are way too many unfinished or un-started projects awaiting to leave this one in limbo).
We can continue to think about and look for tile and design ideas for the mosaic project, but in the meantime, I think the completed panel looks great. We painted the panel with some metallic hammered-finished paint we had used before. In this iteration it doesn't look hammered, but I like the color and sheen.
We decided to use oak molding to frame the green man and the panel to make it look more finished. The Green man is secured with velcro, and the molding also helps hold him in place to prevent a tragic accident.
Today we also installed some red oak molding on the existing white oak cabinets, which obscures some paint splooges and other old-house related problems, and makes the mixing of red and white oak look a bit more intentional. I think it looks great, and I feel like other than the ugly tile backsplash, I have a fabulous, highly functional kitchen.
Since buying the house in December 2000, we have completed the following kitchen projects:
- painted the walls a combination of green (Behr Fox Hollow) and taupe (Behr Beaverwood)
- installed a new dishwasher and built a cabinet surround for it
- moved the countertop over the dishwasher and built a granite tile counter insert
- replaced the now-leaking kitchen faucet (grrr)
- installed stereo speakers
- replaced 3 light fixtures
- installed new picture window overlooking the backyard
- added shelves to the kitchen cabinet
- added an outlet to the pantry
- re-built cabinet from the bathroom and moved it to the kitchen (to the right of the microhood)
- added outlets for the microhood and range
- made/installed beach stone drawer pulls
Thursday, February 21, 2008
Hanging the tea cabinet
After several coats of latex polyurethane, yesterday we hung the tea cabinet. It fit exactly into the narrow space between the glassware cabinet and microhood. No sooner was it in before I was sliding the tea canisters into the shelves and moving Goldeneye the Rooster (a long ago gift from a friend) to his new home. We cut the last piece of cabinet which will hide the outlet/cord and prepared to install it.
Then Dan had an idea.
Rather than just paint the panel, we could make a ceramic tile mural --our version of 1% for art. Here in Maine all new school construction requires that 1% of the total building cost be spent on art for the building --a great idea, (especially since some communities are so cheap I think they'd prefer to return to the days of the 1-room schoolhouse.)
The crazy thing? We already have this gorgeous bas relief ceramic tile of a Greenman which we could use in the mosiac. We found it while on vacation one summer and loved it so we purchased it with an eye to including it in the kitchen somewhere; probably when we finally rid our kitchen of the world's ugliest tile backsplash.
So, now we are playing with the idea of a mosaic, using ceramic tile we have on hand purchased from tag sales with the original idea of making mosaic hypertufa items. Since Dan is the artist in the family and he has never made a mosaic before and I can barely draw a diagram of the garden, let alone produce artwork, this will be challenging, but fun.
We will play around with the concept and see what happens.
Tuesday, February 19, 2008
The tea cabinet
Today we constructed the tea cabinet, which will fit on the left of the microhood and is a narrow cabinet which I plan to use to store canisters of various teas. We realized the cabinet needed to be installed prior to installing the remove-able back of the above microhood shelf so we can install a cleat on the tea cabinet to hold the back in position.
Much careful measuring ensued, but we still cut the back of the tea cabinet incorrectly on the first try. We subtracted the width of the cabinet sides twice, grr, leading to the cabinet back being cut one inch too narrow. The second time we were dead on, though. The cabinet went together pretty quickly. We discovered veneer edging on some past project, and put it too good use here covering the exposed plywood edges. The veneer is a huge timesaver, it is covered with a heat sensitive adhesive, you use an ordinary household iron to attach the veneer, let it set, then trim the veneer to fit. Amazing! What takes longer is covering it all with several coats of polyurethane --very tedious.
The cabinet is made from red oak plywood, as white oak plywood, so popular 25 years ago, was nowhere to be found. It won't match the existing cabinets exactly, but we hope with the addition of some red oak molding here and there, it will look planned. Probably not, but it will be the cabinetry equivalent of plaid, my favorite color, so it will work for me.
With luck and perseverance, we should be able to hang the cabinet and put in the back wall tomorrow.
The new microwave, BTW, works great, heating things much faster than the old one, and more quietly, too. The fan feature of the vent is quiet, but I haven't given it a real workout yet -- I foresee some sauteed garlic and onions on the menu soon.
Monday, February 18, 2008
Halfway finished -- hood installed
Although as we looked into starting the project, we thought it would be tediously fiddly, in the end, installing the microhood wasn't so bad.
As we looked it over, we realized that this model of hood is designed to sit flush against the wall; the power cord emerges from the top of the machine and plugs into an outlet placed above the machine. Hmm, that was a problem.
Behind that particular wall are the stairs, which made placing the outlet, done a year or so ago, very tricky. The outlet was not moving. Thus we decided to build a chase to give us room to plug the microhood into the outlet. We found the studs -- never quite where you'd expect them to be in an old house -- and screwed 2x4s onto the studs over the drywall after removing 2 rows of the world's ugliest ceramic tile backsplash.
We cut a piece of remnant 3/4 inch plywood left in inventory from a previous project to go over the 2x4s. The microhood would hang from this, so we wanted sturdy 3/4' plywood securely attached to the wall. This left a gap of about 1 1/2" between the plywood and the drywall.
We also had to build a shelf from which the microhood would be bolted into position. The shelf had to be pre-drilled with holes for the bolts and an access hole for the power cord to snake through. Dan handily cut the plywood with a circular saw, and we screwed the plywood on with large, heavy wood screws and plenty of them.
Next, we attached the bracket which would support the microhood. Then the microhood was set onto the bracket --no photos since it took both of us to manage that. I held it in position while Dan secured the bolts and snaked the cord through the access. Ta daaaaa, it is installed. Dan removed the plastic and plugged it in --lights, power, fan!.
Tomorrow we install a false back to hide the outlet, and begin work on the narrow tea cabinet planned for the left side of the microhood.
Sunday, February 17, 2008
Project week: Installing a microhood
If it is a school vacation week, and it is too cold for gardening, then it must be time for an old-house project, as heaven knows, we have oodles of them. This week's project is constructing a cabinet and installing a microwave-range hood above the range, and in the process, hiding 2 more rows of the ugly tile backsplash (3 cheers!).
Our cape is from the 1800s, and is the classic New England cape with an el with an el with a barn. In other words, if we had livestock, I could get to the barn from the house in my slippers to milk the cows --no need to go outside. Over the years, the interior of the house has been changed many times (staircases moved and added, pesky load-bearing walls removed, indoor plumbing added.) At some point in the past, our kitchen was moved to el #1, modern(ish) plumbing was added, and in the more recent past, custom oak cabinets were built and installed by the previous owner. They are high quality solid wood cabinets and I can't foresee ever replacing them (unless I win the lottery and then I might consider custom built solid cherry cabinets with a natural oil finish --not that I've thought about it.) The upper cabinets are open, however, and this leads to my love-hate relationship with the cabinets.
I love the open cabinets, but hate the fact that the contents get slightly greasy and dusty from cooking, because the kitchen does not have a vent. Since the delicious aroma of caramelizing onion or sauteed garlic isn't being whisked away, the air carrying the aroma molecules eventually leaves an greasy residue on the adjacent surfaces. As my loathing of scrubbing is well-documented, this must stop.
After 7 years of bitching about it, this week we are installing a vent. We first planned to install only a vent, but then saw my pal Holly's nifty microhood when she built her kitchen, and realized we too could install a microhood and free-up some counter space at the same time. More room for clutter, yay!
For now it will be a recirculating fan with 2 grease-trapping filters, but someday in the future we hope to run the vent out of the house through an exterior wall --just not while it is 15° F outside. So, let the fun begin, and forgive me if I am slow to post -- I'll be up to my elbows in cabinet construction.
Saturday, February 16, 2008
Excellent award --who, me?
Thanks Laura at Urban Hennery for passing on an E is for Excellent Award to me! I am honored to be included in the ranks of so many other bloggers who have been named excellent by their readers. I need to similarly recognize 10 other bloggers whom I feel are excellent (which will be challenging since of course Urban Hennery is one of the ones I would have named), so I'll be working on this over the next few days, in the midst of the big vacation project!
Friday, February 15, 2008
A fine theme song for freecycling
Theme song from Sandford & Son
Although, consider this a warning: if you are one of those people who frequently finds a musical phrase stuck in their heads, DO NOT LISTEN TO THIS!
I've been humming this little melody for 3 solid says. Quincy Jones, the composer, clearly has an evil streak.
Although, consider this a warning: if you are one of those people who frequently finds a musical phrase stuck in their heads, DO NOT LISTEN TO THIS!
I've been humming this little melody for 3 solid says. Quincy Jones, the composer, clearly has an evil streak.
Wednesday, February 13, 2008
Wet and wintry Wednesday
Yet another snowstorm dumped 8 inches of snow here at Henbogle overnight before the freezing rain, then rain, then freezing rain, created a wet, slushy mess. Schools and businesses statewide were closed, and even my campus sent staff home early due to the slippery roads and threat of late day freezing.
I was able to work from home today, and while I was on a telephone meeting in the morning, Dan shoveled and used our new roof rake to clean snow off the roof in the ice dam zone. The poor feller was soaked through by the time he finished.
Once I was off the phone, Dan called in to a conference call about the statewide 7th and 8th grade computer program. (In Maine, every 7th & 8th grade student has a Mac iBook computer.) Love it or hate it (and I mostly love it) technology has radically changed the way we work. I for one LOVE being able to work from home on days like today.
Tuesday, February 12, 2008
Dump picking, or rather freecycling
Garden Girlie posted recently about a freecycled shelving unit she found and will be using in her garden to start seeds, etc. Whilst driving somewhere with her hubby, she pulled over to collect it, plucking it from the very jaws of dumpsterdom, and is giving it a new lease on life. I love that.
Dan and I have a long history of freecycling, to use a more PC term. Back in the day, we'd call it dump picking, but the dump days are over, and recycling center picking just doesn't have that ring of authenticity. Semantics aside, we have a long and storied history of screeching to a halt to collect one man's trash and put it to good use. Our garden sink, for example. Our magnificent seed-starting cart, rescued from a grocery store dumpster by my gallant and thrifty spouse, the wire garden fencing rescued from the scrap-metal pile. Then there are the fabulous antique side windows Dan found by the side of the road, and the cement mixer (not free but darn close).
I've written about this before, but now I'm wondering: How many others are there like me, unafraid to screech to a roadside halt and turn trash into treasure?
Sunday, February 10, 2008
A visit from Holly
My pal Holly, yes, the newly-wed Holly, came to visit this weekend, arriving Friday evening after the snowstorm, and leaving Sunday after Saturday night's snowstorm.
She and Dan greeted me at the door with a margarita after my harrowing drive home, in which I narrowly missed being squashed between 2 SUVs in a 20-car pileup on the highway. Fortunately, I knew a back way home, and after 45 minutes of inching 2 miles along, I exited and took a back road and avoided the hours of waiting for traffic to clear.
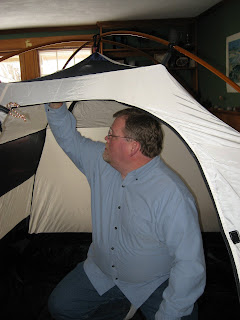
We had a quiet weekend, what with all the snow, but had lots of fun cooking (apricot ginger scones), playing cards, a church supper with friends and more cards, and lots of laughter. Our new, larger tent had arrived, and Holly helped us set it up and check it out -- after all, only 37 more days until spring! Plans call for a joint camping trip somewhere with Holly and Dave next summer.
The new tent is big. It has a bit more floor space than my trusty 20+ year old Eureka (99x80 vs 90x60) and a lot more headroom. I think we could fit the old Eureka inside. I wish the new tent had mesh doors with a zip up cover like my Eureka tent did, but it is a nice neutral color. The thought of spending a rainy day in an orange and yellow tent is enough to make me take up drinking, so the soothing pale gray and navy of the new tent look good. Another reason to be counting the days until spring....
Friday, February 08, 2008
This Afternoon Snow Likely Hi 27°F | Tonight Snow Likely Lo 16°F | Saturday Chance Snow Hi 34°F | Saturday Night Snow Lo 22°F | Sunday Snow Likely Hi 33°F | Sunday Night Slight Chc Snow Lo 12°F | Monday Mostly Sunny Hi 30°F | Monday Night Mostly Clear Lo 10°F | Tuesday Chance Snow Hi 27°F |
What is wrong with this picture?
Spring is a mere 40 days away, that is what's wrong with this picture. Enough, already! The chickens are not happy with all this snow, and frankly, neither am I.
Monday, February 04, 2008
By request: Roasted Cauliflower Veggie Soup
1 head cauliflower
3 garlic cloves
2 medium onions, cut in wedges
3 T olive oil
I carrot, grated
1 celery stalk, thinly sliced
1 waxy potato, washed and grated
3 c broth or water
½ t crushed dried thyme leaves
1 bay leaf
2 cream, or to taste
hefty grind of black pepper
salt to taste
To roast the cauliflower:
Cut cauliflower into same-sized florets. Toss cauliflower, garlic, and onions with 2T oil to coat and roast in middle of 425°F oven until brown and caramelized, stirring frequently during the latter part of the roasting. Can be made in advance and refrigerated until needed.
In a soup pot, sauté the celery, carrot and potato in 1T oil until tender. Add broth, water, roasted cauliflower mixture, and herbs and simmer for 30 minutes, or until cauliflower is very tender. Discard bay leaf and puree in blender (or you could skip this step if you cut the cauliflower smaller). Return soup to pot and stir in cream, salt and pepper to taste. Heat through and serve.
I make it a little differently every time. I rarely have cream on hand, so often use half and half. Evaporated milk will work, too. A little cheddar tastes great melted in and it would probably be gorgeous topped with a big slice of bread and cheese and broiled, French onion soup style.
Birthday girls
Happy Birthday to us!
February was a busy month for the Elliott and Tompkins family hospitals. My birthay is February 3, Dan's sister Louise's birthday is today, Dan's Mom's birthday is tomorrow, and Dan's niece Marriane is also a February baby.
Yesterday I enjoyed a lovely birthday party at our friends Karen's and Bill's home, with our other friends Bill and Michelle in attendance. Karen as usual outdid herself with a delicious cake and sparkling beverages; friendship sweetened the afternoon even more. Thanks to all for a great day, and happy Birthday, Mom, Louise and Marianne!
Sunday, February 03, 2008
Camping fools
We've booked our campsite at the gorgeous and remote Cobscook Bay State Park for next summer. Reservations opened on Friday, so I promptly booked a campsite on Cobscook Point, overlooking Whiting Bay, and then booked Antonio for house-sitting. The photo is of the view from our campsite --nice, huh? Where else can you spend 8 nights directly on the water for less than the cost of one night at a Hampton Inn?
We'll be camping in style, too, with a tent upgrade from my well-loved 20+ year old
Alpine Meadows tent, seen on the right from last summer. We've ordered a spacious new 4-person tent, so there will be plenty of room for our queen-size air mattress inside.
After a day spent wedged in my kayak, or hiking the Bold Coast Trail, I want to stretch out and relax in comfort. I've earned that air mattress after years of the wafer-thin closed-cell foam sleeping pads and a wadded-up fleece jacket for a pillow. With our screen tent and the new tent, we'll be camping in 5-star style, and I can hardly wait.
Saturday, February 02, 2008
What we are eating, part 2
When last we checked, we'd enjoyed grilled cheese sandwiches for dinner on Wednesday evening. Later that evening, I roasted up some cauliflower with garlic and onion to use for soup the next day. Here's how we used all those groceries during the remainder of the week.
Thursday
B: homemade muesli with yogurt, (milk for Dan), coffee,
L: sliced meatball sandwiches, oranges
D: roasted cauliflower soup with root vegetables
Friday
B: Henbogle eggs and toast, coffee
L: Ali, lunch meeting on campus, Dan soup, oranges
D: Pasta with meatballs and red sauce redux (and boy was I sad to see the last of the meatballs and sauce!)
Saturday
B: yogurt, toast, coffee
L: leftover cauliflower soup, white bean salad with green beans and tuna
D: freezer meal of pork chops with whiskey cranberry sauce, pan blackened Brussels sprouts, bread
One of the things I noticed about the Hungry Planet photo series was how ubiquitous soft drinks have become. Dan and I rarely buy soft drinks, treating soft drinks as party fare. We are very fortunate to live in a town with great-tasting, non-chlorinated, non-fluoridated tap water --our town won the statewide drinking water taste test this year -- we drink water with every meal, and we even bring it with us to work and on our travels. I'm sure that cuts down considerably on our grocery expenditures.
As you can see, I plan on using leftovers for lunches whenever possible, and we will often see a meal re-created into something else later on in the week. We used only a small portion of many of our grocery purchases for last week -- we will need to purchase a few items such as coffee, coffee filters, milk, canned beans, and some fruit but that's about all. There are meatballs in the freezer, I'll cook a pork roast tomorrow for sandwiches and other meals this week, and we'll no doubt have a meal of soup one night, too.
It is work to prepare meals from whole ingredients, but with practice, it gets easier and it is work that feels right. Preparing delicious meals is well worth the time invested. Dan plays an important role in the process, too. I cook, he cleans. When I arrive home from work (usually after Dan) any breakfast mess is cleaned up and the kitchen is ready for me to cook, and after dinner, he loads the dishwasher and does the rest of the cleanup detail. It's a great system!
Subscribe to:
Posts (Atom)